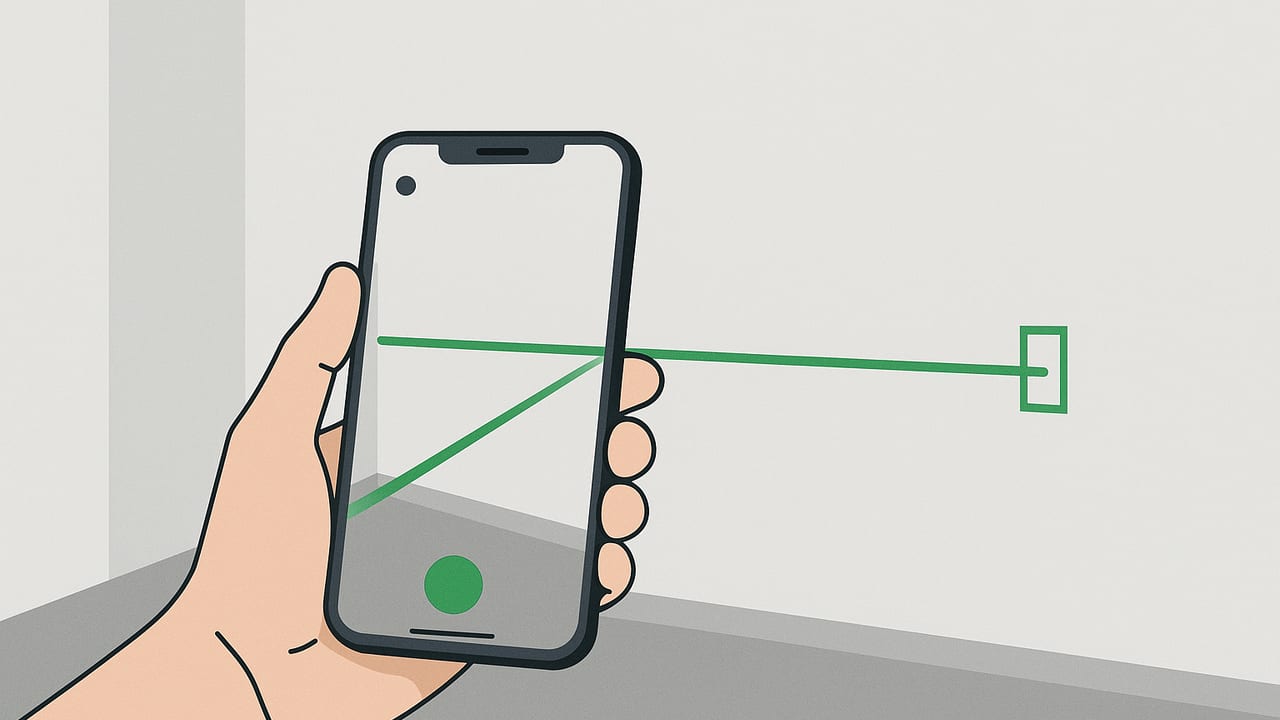
Can your phone mimic a line laser? With the right workflow, yes—at least for many DIY and pro tasks. This guide explains how to achieve laser level projection from a smartphone camera using on-screen overlays, your device’s motion sensors, and optional accessories. You’ll learn when it works well, how accurate it can be, step-by-step setup, and advanced tricks to keep the virtual line dead straight.
What “laser level projection” really means on a phone
Most phones do not contain an actual laser diode or an optical projector. When people say laser level projection from a smartphone camera, they usually mean one of two things:
- AR/overlay method: The app uses the camera feed and motion sensors (accelerometer, gyroscope, magnetometer, sometimes LiDAR) to overlay a perfectly horizontal or vertical line on the live view. You don’t project light onto a wall—the line appears on-screen, aligned to the real world.
- External accessory method: A clip-on or nearby laser level is mechanically aligned with your phone. The phone provides precise angular guidance; the external unit emits the real laser line onto surfaces.
In this article, we focus primarily on the AR/overlay approach because it’s available to anyone with a compatible smartphone and a capable app. The camera provides context; the sensors provide reference orientation; the software renders a straight virtual line you can trust.
When a camera-based virtual laser line works well
A virtual line is ideal when you need a consistent reference but don’t need a physical beam painted on the wall. Typical use cases include:
- Hanging frames and shelves: Align screws, anchors, and brackets across a wall without pencil grids.
- Tiling layout planning: Check that your first row and reference lines are square and level before committing with thinset.
- Trim and molding: Keep chair rails, wainscoting caps, or crown return lines straight across varying surfaces.
- Shop/jig setup: Align fences and fixtures on a workbench or router table using the phone as a precise reference line.
- Ceiling marks and conduit runs: Verify that marks remain level from corner to corner before drilling.
For tasks requiring a bright line across a large area (e.g., entire room or exterior facade), a real rotary or line laser is still best. But for indoor spans under a few meters, AR overlays are quick, silent, and surprisingly robust.
Accuracy: what to expect
Modern phones can measure orientation with impressive precision. With a good app and careful technique, a virtual line can be within ±0.1° to ±0.3° (roughly ±1.7 to ±5.2 mm over 1 m). Your results depend on calibration, how steady the mount is, magnetic interference, and lighting/texture for AR tracking.
Here’s a practical comparison to set expectations:
| Method | Typical Accuracy | Best Use | Notes |
|---|---|---|---|
| Camera-based virtual line (AR overlay) | ±0.1° to ±0.3° | Indoor spans, layout checks, fixtures | Requires stable mount and sensor calibration |
| Dual-axis bubble level app (no camera) | ±0.1° to ±0.2° | Leveling surfaces and tools | Great for references; not a visible line on a wall |
| Consumer line laser | ±0.2 mm/m to ±0.5 mm/m | Room-wide visible lines | Physical beam; requires batteries and calibration |
| Rotary laser | ±0.1 mm/m to ±0.3 mm/m | Large sites, long distances | Pro-grade, higher cost and setup |
Takeaway: AR overlays are competitive for short distances with careful technique. If you need a bright physical beam over long spans, use a dedicated laser level.
Setup: gear and prep for reliable overlays
You don’t need much to create a rock-solid virtual laser line, but the following will boost accuracy and repeatability:
- Tripod or clamp mount: Stabilize the phone. A wobble is your biggest enemy.
- Flat reference surface: Mount the phone against a verified vertical edge (door jamb, machinist square) to establish plumb. For horizontal, use a leveled tripod head.
- Sensor calibration: Perform the app’s level/compass calibration routine in a magnetically clean area.
- Lighting and texture: AR tracking thrives on matte, textured surfaces. Avoid glossy, featureless walls if possible; add painter’s tape for features.
- Distance: Keep the camera 1–3 m from your target for a wide, stable field of view.
- Check drift: Re-verify level orientation every 10–15 minutes, especially after moving the mount.
Step-by-step: create a straight horizontal or vertical line using the camera
Method A: AR overlay “virtual laser” line
- Calibrate sensors: Open your measurement app and complete any level and compass calibration prompts. Rotate the device through figure-eight patterns when requested. Avoid metal surfaces during this step.
- Stabilize the phone: Mount it on a tripod, clamp, or against a true edge. Confirm the device is not rocking. If available, use a mount with a leveling base.
- Select line mode: Switch the app to “Horizontal line,” “Vertical line,” or “Plumb line.” The app should lock the line to gravity-aligned axes rather than your hand angle.
- Align the frame: Point the camera at your working surface. Keep the phone square to the wall to minimize perspective skew (use gridlines if available).
- Fine-tune with dual-axis feedback: Nudge the mount until pitch and roll read 0.0° or show a green/centered indicator. The overlay line should snap level or plumb.
- Mark your reference: Place painter’s tape along the on-screen line’s endpoints or use a straightedge to transfer the line to the surface. For repetitive marks, note the exact height from the floor and re-check the overlay periodically.
- Re-check: After any movement, re-center the pitch/roll. If the app offers line “lock,” enable it to prevent drift from minor bumps.
Method B: External laser + phone guidance
- Level with phone: Use your phone’s dual-axis level to set a bracket or shelf perfectly level.
- Attach the laser: Place a small line laser on the bracket, aligning it to the phone’s level reference.
- Project and mark: Turn on the laser, project across the room, and transfer marks. Use the phone’s overlay for spot checks at distant points.
This hybrid method gives you the visibility of a real laser beam and the precision/ease of smartphone alignment.
Advanced: plane detection and world anchors
On devices that support LiDAR or robust AR frameworks, plane detection helps your virtual line “stick” to a wall more reliably. The app identifies a wall plane in 3D and anchors the overlay to that surface, reducing jitter when you move slightly or when lighting changes.
- Benefit: Lines remain registered to a real wall plane as you adjust position, improving stability and repeatability.
- Tip: Give the AR session a few seconds to scan the scene. Slowly pan across the wall so the system can detect stable features.
Sample iOS snippet: draw a level line overlay with device attitude
Below is a minimal Swift example that reads device attitude and draws a horizontal line across a camera preview when pitch/roll are level. This demonstrates the core idea behind camera-based virtual lines (for illustration only):
import UIKit
import AVFoundation
import CoreMotion

final class LevelLineViewController: UIViewController {
    private let motion = CMMotionManager()
    private let lineLayer = CAShapeLayer()
    private let previewLayer = AVCaptureVideoPreviewLayer()

    override func viewDidLoad() {
        super.viewDidLoad()
        setupCameraPreview()
        setupLineLayer()
        startMotionUpdates()
    }

    private func setupCameraPreview() {
        let session = AVCaptureSession()
        session.sessionPreset = .high
        guard let device = AVCaptureDevice.default(for: .video),
              let input = try? AVCaptureDeviceInput(device: device) else { return }
        session.addInput(input)
        previewLayer.session = session
        previewLayer.videoGravity = .resizeAspectFill
        previewLayer.frame = view.bounds
        view.layer.addSublayer(previewLayer)
        session.startRunning()
    }

    private func setupLineLayer() {
        lineLayer.strokeColor = UIColor.systemRed.cgColor
        lineLayer.lineWidth = 2
        lineLayer.opacity = 0.9
        view.layer.addSublayer(lineLayer)
    }

    private func startMotionUpdates() {
        motion.deviceMotionUpdateInterval = 0.02
        motion.startDeviceMotionUpdates(using: .xArbitraryZVertical, to: .main) { [weak self] motion, _ in
            guard let self = self, let att = motion?.attitude else { return }
            let pitch = att.pitch * 180 / .pi
            let roll  = att.roll  * 180 / .pi
            self.updateLine(pitch: pitch, roll: roll)
        }
    }

    private func updateLine(pitch: Double, roll: Double) {
        // Snap to level if near 0° (tweak thresholds as needed)
        let isLevel = abs(pitch) < 0.2 && abs(roll) < 0.2
        let y = view.bounds.midY
        let path = UIBezierPath()
        path.move(to: CGPoint(x: 0, y: y))
        path.addLine(to: CGPoint(x: view.bounds.maxX, y: y))
        lineLayer.path = path.cgPath
        lineLayer.strokeColor = (isLevel ? UIColor.systemGreen : UIColor.systemRed).cgColor
    }
}
To take this further, pair with ARKit plane detection and world anchors for on-surface alignment, and add UI helpers such as gridlines, angle readouts, and lock/snap controls.
Pro tips for straighter, more stable lines
- Use a real mount: Handheld is fine for quick checks, but a tripod or clamp dramatically improves precision.
- Square to the surface: Keep the camera sensor parallel to the wall to avoid perspective skew. Use an on-screen grid.
- Leverage endpoints: Mark two points far apart along the virtual line. A longer baseline amplifies small errors for easier correction.
- Control the environment: Reduce glare on glossy paint. Add low-tack tape or sticky notes to give AR more features.
- Recalibrate after moving: If you shift more than a meter or rotate the phone significantly, re-run a quick calibration.
- Check with a physical level: Spot-verify with a compact bubble level or a known true edge for peace of mind.
- Record and repeat: Note the phone height and distance so you can recreate the same line later.
Safety and limitations
- No real beam: A camera overlay is not a safety hazard like Class 2/3 lasers—but it also won’t be visible on the wall without looking at the phone screen.
- Magnetic interference: Keep away from steel studs, speakers, or large appliances when calibrating. They can skew readings.
- Vibration: Heavy foot traffic or nearby machinery can cause jitter. Re-check alignment if the mount vibrates.
- Long spans: For runs beyond a few meters, switch to a dedicated line or rotary laser for visibility and ultra-low drift.
Troubleshooting common issues
- Wavy or drifting line: Stabilize the mount; re-run sensor calibration; allow AR to scan the wall for a few seconds.
- Line seems level on-screen but marks don’t match: Ensure the phone is square to the wall; verify with a physical level; avoid extreme wide-angle distortion by not getting too close.
- Compass acting erratically: For vertical/plumb work, prefer gravity-aligned modes that ignore compass heading. Use magnetometer only when you need a specific azimuth.
- Low-light noise: Increase ambient light so the camera and AR system can lock onto texture. Avoid pointing at backlit windows.
- Phone heats up during long sessions: Reduce screen brightness slightly, close background apps, and take short breaks to maintain sensor stability.
Rule of thumb: If you can hold a bubble level steady and read it clearly, you can make a camera-based virtual laser line just as dependable for short indoor spans—provided you mount the phone, calibrate, and verify.
If you prefer an all-in-one iOS solution that pairs dual-axis leveling with a clean camera overlay for virtual line projection—and works entirely offline—consider Level Tool.
