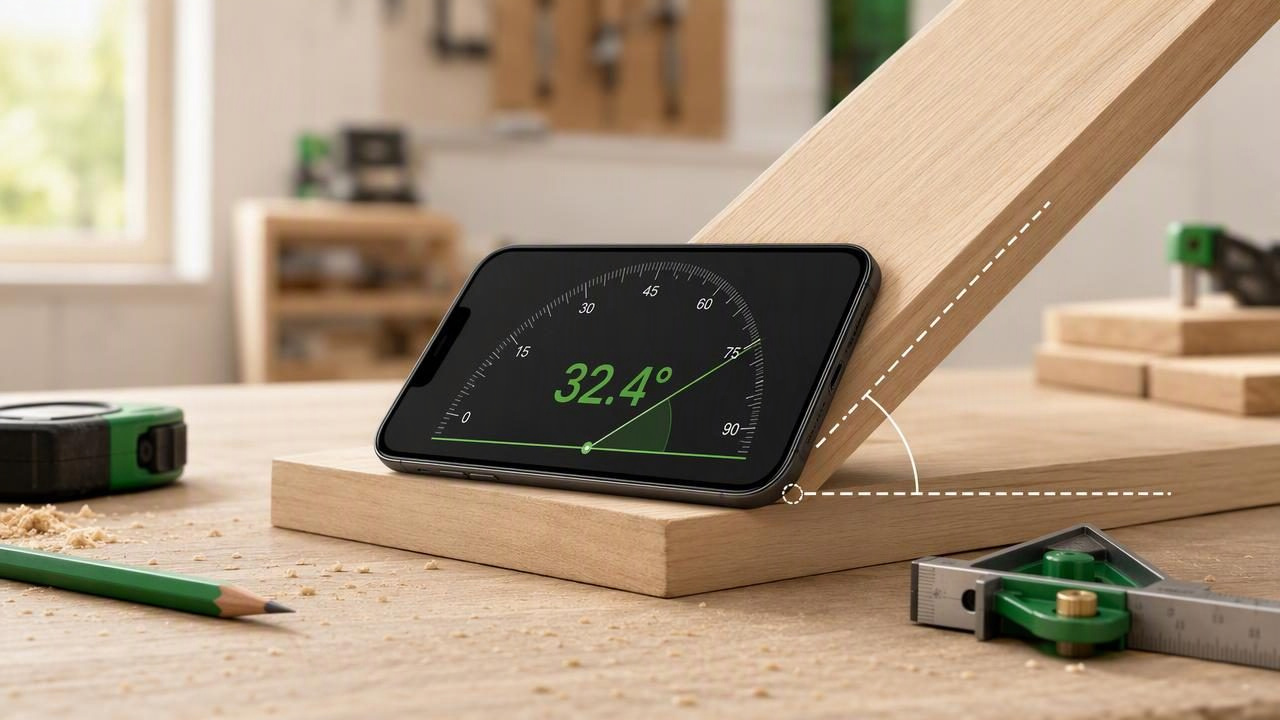
An iPhone angle finder for accurate custom angles can be useful when a project needs more than simply “level” or “plumb.” Whether you are installing a 37-degree shelf brace, setting a ramp slope, trimming a support block, or positioning an outdoor chair back, an angle target gives you a clear number to work toward.
Your iPhone uses internal motion sensors to detect its orientation. When an angle meter app is properly calibrated and placed in firm contact with a stable surface, it can help you compare a workpiece against a chosen target angle. The most dependable results come from good setup habits: use a flat reference, establish a practical tolerance, take repeat readings, and understand where a phone-based measurement is less appropriate than a dedicated trade instrument.
What an iPhone Angle Finder Measures
An iPhone angle finder measures the orientation of the phone relative to gravity or, after reference calibration, relative to a surface you choose. Depending on how you place the device, the reading may show:
- Pitch: the forward-to-back tilt of a surface.
- Roll: the side-to-side tilt of a surface.
- Angle from level: a value such as 5 degrees, 22.5 degrees, or 37 degrees.
- Angle from a reference surface: useful when the starting surface is intentionally not level.
This distinction matters. A board positioned at 15 degrees from level is not necessarily at 15 degrees from another board. If the floor itself slopes 2 degrees, measuring from gravity and measuring from the floor can produce different answers. Before beginning, decide whether your project requires an angle relative to level or relative to an existing component.
Choose the Right Angle Target Before You Measure
Custom angles are common in DIY work, but they should be expressed clearly before you start cutting or fastening. Write down the target and identify its reference point. For example, “cut this brace at 37 degrees from its long edge” is more useful than “make it match the picture.”
| DIY task | Typical target | Best reference | Why it matters |
|---|---|---|---|
| Shelf support brace | 30 to 45 degrees | Horizontal shelf or wall | Helps create a consistent support angle. |
| Accessibility ramp | Specified slope | Level ground | Shows how much the ramp rises over its run. |
| Angled planter stand | Matching leg angles | First completed leg | Improves symmetry among repeated parts. |
| Chair-back mock-up | Custom comfort angle | Seat surface | Lets you compare the back to the seat, not the floor. |
| Trim or wedge block | Measured transition angle | Adjacent surface | Supports a closer fit at an uneven junction. |
For a slope, you may also need to convert degrees into a rise-over-run figure. A 5-degree slope is not the same as a 5% grade. The relationship is:
grade (%) = tan(angle in degrees) × 100For instance, an angle close to 5 degrees is approximately an 8.7% grade. Check the requirements for your specific project if a building code, manufacturer instruction, accessibility standard, or engineering plan applies.
Calibrate Before Measuring a Custom Angle
Calibration aligns the app’s reference with a known surface. It does not make an uneven table perfectly level, and it does not turn a phone into a certified measuring instrument. Instead, it improves repeatability when you are comparing surfaces during the same job.
For an angle measured from true level, use a stable surface you reasonably trust as level. For an angle measured from an existing object, use that object as the reference. This second approach is especially helpful when matching an old stair rail, roof feature, furniture part, or sloped work surface.
A practical reference-calibration process
- Clean dust, chips, and moisture from the surface and the phone case.
- Place the iPhone on a broad, stable, reasonably flat reference area.
- Ensure the phone is not rocking on a camera bump, thick case edge, or debris.
- Set the angle meter’s reference or zero function while the phone is still.
- Lift the phone, replace it in the same position, and check whether the reading returns close to zero.
- Repeat the placement from the opposite direction where practical.
If the readings shift noticeably each time, solve the setup problem before using the value. Try a flatter contact surface, remove an uneven case, reposition the phone, or wait until vibration stops. A calibration that cannot be repeated is not a reliable basis for a precise custom angle.
Actual Contact Is More Important Than a Perfect Screen Reading
For accurate custom angles, the physical contact between the phone and the workpiece is essential. The display may show a precise decimal, but that number only reflects the orientation of the phone itself. If the phone is perched on a rounded edge, bridging a knot in wood, or tilted by a protective case, the reading may not represent the material beneath it.
Use the longest, flattest edge of the device that can make consistent contact. On a narrow board, lay the phone along the board rather than across it if that provides a wider contact area. On rough lumber, first place a straight, flat offcut or known straightedge on the material, then measure the straightedge. This averages out small surface irregularities and makes repeat placement easier.
Rule of thumb: Measure the surface, not the bump, gap, case edge, or camera housing between the surface and your iPhone.
Concrete Example: Set a 37-Degree Shelf Brace
Suppose you are making two wooden braces for a floating shelf and want each diagonal brace to sit at 37 degrees from the horizontal shelf board. You are not using the phone to replace layout marks or a saw guide; you are using it to verify that both assembled braces match the intended angle.
- Lay the shelf board flat on a sturdy workbench.
- Place the iPhone directly on the shelf board and set this surface as your zero reference.
- Temporarily clamp the first diagonal brace in position.
- Place the phone lengthwise against the broad face of the brace. If the brace is narrow, hold a straight, flat scrap against it and place the phone on that scrap.
- Adjust the brace until the angle meter reads 37 degrees relative to the shelf board.
- Set a tolerance before fastening. For general woodworking assembly, a target range such as 36.5 to 37.5 degrees may be more practical than chasing a changing tenth of a degree.
- Check the reading three times, removing and replacing the phone between checks.
- Fasten the first brace, then use the same reference-calibration process to position the second brace.
After fastening, verify both braces again. If one reads 36.8 degrees and the other 37.2 degrees, they are likely close enough for many visual shelf-support applications. If the project involves a tight mechanical fit, load-bearing design, or pre-engineered hardware, follow the hardware instructions and use the measurement method required for that system.
Use Targets, Tolerance, Sound, and Haptics Effectively
A target angle is useful because it changes the question from “Does this look right?” to “Is this within the acceptable range?” Set the desired angle first, then decide how much variation the job can tolerate. Fine furniture, repeatable jigs, and close-fitting trim often demand tighter consistency than a garden stand or temporary workshop fixture.
Sound and haptic feedback can make adjustments easier when your hands are occupied holding a component. Instead of repeatedly looking down at the display, you can move the workpiece gradually and use the feedback as a cue that you are approaching or reaching the target. This is most helpful during clamping, when a small movement can change the final position.
However, feedback should not replace a final visual reading and repeat check. Vibration, pressure from your hand, or shifting clamps can alter an angle after the target alert occurs.
How to Improve Repeatability
Repeatability means getting nearly the same result when you measure the same setup more than once. For DIY angle work, repeatability is often more valuable than a decimal-heavy display. Use these habits to improve it:
- Measure in the same phone orientation each time.
- Use the same contact edge and location on each matching part.
- Keep the workpiece supported so it cannot flex under pressure.
- Wait for the reading to settle before recording it.
- Take at least three readings when the angle affects a cut, fit, or paired assembly.
- Record the range, not just the best reading: for example, “36.9 to 37.1 degrees.”
If readings vary beyond your tolerance, do not average them and assume the result is acceptable. Identify the cause. Common issues include a warped board, an unstable bench, inconsistent contact, a loose clamp, or a phone case that prevents flat placement.
Limits of a Phone-Based Angle Measurement
An iPhone angle finder is convenient for checking and comparing many DIY angles, but it has limits. It is not intended to replace professional surveying equipment, calibrated machinist tools, structural design calculations, or instruments required by a specification. It also cannot determine whether a wall, floor, or vehicle is safe, code-compliant, or structurally sound.
Avoid relying solely on a phone measurement for critical safety decisions, precision metal fabrication, regulated construction verification, or any task where a small angle error could create injury, damage, or legal noncompliance. For those cases, use the required certified equipment and consult an appropriately qualified professional.
Remember that angle measurement requires contact with the surface or with a stable straightedge used as an intermediary. A phone angle meter does not measure an angle from a photograph, through a wall, or across open space without a physical reference surface.
Make Custom Angles Easier to Reproduce
Once you have found the correct angle, preserve it. Mark the workpiece, label the orientation, and make a simple template if multiple parts need the same setup. On paired pieces, mark “left,” “right,” “top,” and “face out” before cutting or fastening. These steps prevent a correct measurement from being applied in the wrong direction.
For an iOS measurement option with offline core measurements, Level Tool’s guide to measuring angles on an iPhone explains how to approach angle checks with a practical reference and stable contact.
With careful calibration, solid contact, repeat checks, and a realistic tolerance, an iPhone can be a helpful companion for setting custom DIY angles. The goal is not to trust a single number blindly, but to create a measurement process you can repeat confidently from the first part to the last.
