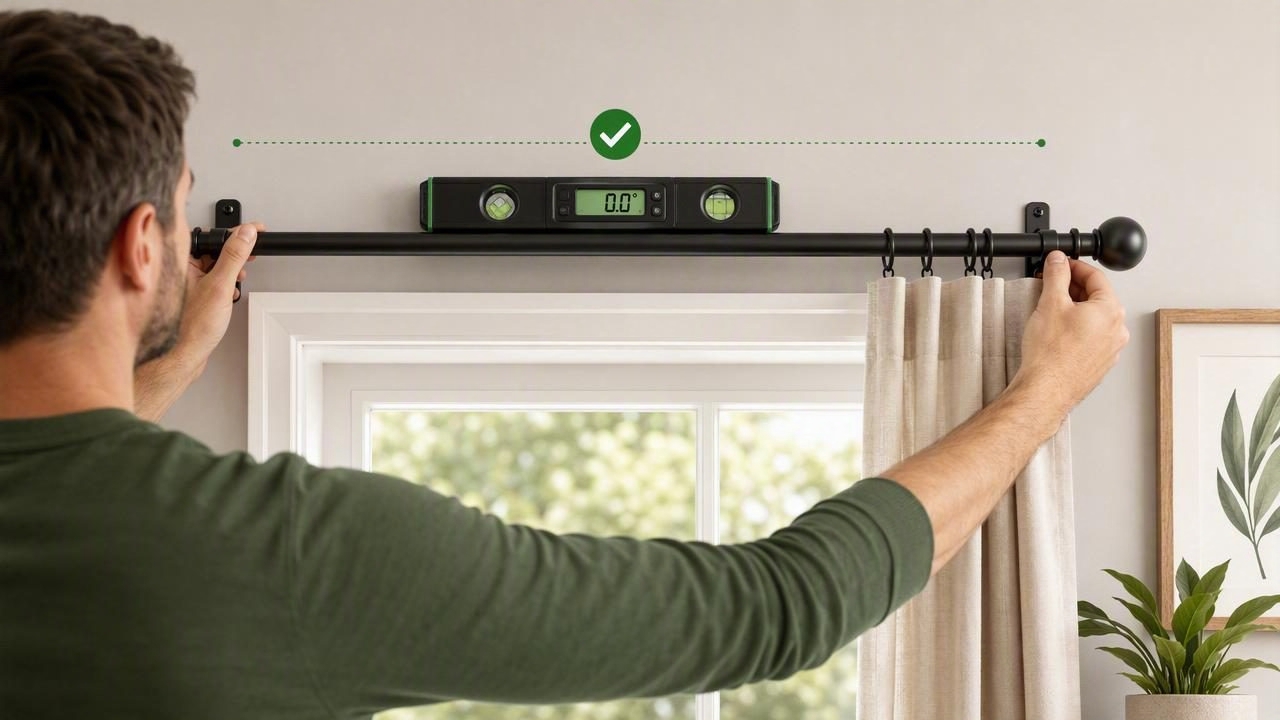
Knowing how to install curtain rods with a digital spirit level can make a major difference in the finished appearance of a room. A rod that is even slightly crooked can make curtains look uneven, cause panels to hang improperly, and draw attention to a window for the wrong reasons.
Fortunately, you do not need advanced carpentry skills to get a clean result. With accurate measurements, suitable wall anchors, and a calibrated digital spirit level on your iPhone, you can position curtain rod brackets evenly and confidently. This guide explains the process from planning placement through checking the final installation.
Why Level Curtain Rods Matter
Curtain rods are highly visible horizontal lines in a room. Unlike a small picture frame, a rod often spans several feet above a window, so minor errors become easier to notice. A level installation improves both appearance and function.
- Better visual balance: Curtains hang symmetrically and frame the window evenly.
- Smoother operation: Curtain rings and grommets are less likely to slide toward one side.
- More accurate drape length: Panels reach the floor or sill at a consistent height.
- A polished finish: Level hardware helps the entire room look more intentional.
- Fewer corrections later: Taking time to level before drilling can prevent unnecessary wall repairs.
A digital spirit level is especially useful because it can show small deviations from level numerically or visually. This gives you more feedback than estimating by eye alone.
Tools and Materials You Will Need
Gather your materials before marking the wall. The exact hardware depends on the rod weight, wall type, and curtain fabric.
| Tool or Material | Purpose |
|---|---|
| Digital spirit level | Checks whether bracket marks and the installed rod are level. |
| Measuring tape | Measures window width, bracket height, and rod extension. |
| Pencil | Makes removable placement marks. |
| Curtain rod and brackets | Supports the curtains and defines the finished width. |
| Drill and drill bits | Creates pilot holes for screws or anchors. |
| Screws and wall anchors | Secures brackets when studs are unavailable. |
| Stud finder, if available | Helps locate solid mounting points behind drywall. |
| Step stool or ladder | Provides stable access to high mounting locations. |
Plan Curtain Rod Placement Before You Drill
The most common curtain rod installation mistake happens before the drill comes out: brackets are placed too close to the window frame or at inconsistent heights. Planning the location first helps make windows appear larger and allows curtains to clear the glass when opened.
Choose the Right Height
A common approach is to mount the rod 4 to 6 inches above the window trim. If your ceilings are high or you want a more dramatic look, mount the rod closer to the ceiling while leaving enough room for the bracket and finials.
For a consistent look across multiple windows, use the same mounting height throughout the room whenever practical. Do not simply measure from the ceiling if floors, trim, or ceilings are uneven; use the window itself as your primary reference and verify each bracket with your level.
Choose the Right Width
Extend the rod beyond each side of the window so the curtain panels can stack mostly outside the glass. In many rooms, extending the rod 3 to 8 inches past each side of the frame works well. Wider extensions may be appropriate for thick drapes or wide windows.
Measure the rod and bracket assembly before marking. Some brackets place the rod center several inches away from the wall, while others have a shorter projection. This affects clearance from blinds, trim, and window handles.
Prepare Your Digital Spirit Level
Before you install curtain rods with a digital spirit level, make sure the device is ready for accurate readings. iPhone-based level tools use built-in motion sensors, so a quick setup check is worthwhile.
- Place your phone on a known flat, stable surface, such as a countertop or a quality physical level.
- Open the digital level function and allow the reading to settle.
- If the app includes calibration, follow its on-screen calibration steps.
- Remove thick or uneven phone cases if they prevent the phone from sitting flat.
- Use the same edge of the phone for repeated checks to maintain consistency.
Keep in mind that your phone should be used as a measurement reference, not balanced precariously on a ladder or held where it could fall. Set it flat against the rod, a straight board, or another stable surface whenever possible.
Step-by-Step: Install Curtain Rods With a Digital Spirit Level
1. Measure and Mark the First Bracket
Start with the side that is easiest to access. Measure upward from the top of the window trim to your selected mounting height. Then measure outward from the window edge to your desired bracket position.
Make a small pencil mark at the center of the future bracket location. Hold the bracket against the wall and mark the screw holes as well. If you plan to mount in a stud, use a stud finder before drilling and adjust the bracket position only if necessary.
2. Transfer the Height to the Opposite Side
Do not assume the opposite side should be marked by measuring only from the ceiling. Ceilings and trim can be slightly uneven, especially in older homes. Instead, use your digital spirit level to establish a true horizontal line from the first bracket mark to the other side.
For wider windows, hold a straight board, long ruler, or the curtain rod itself across the wall at the first mark. Place the phone on the straight surface and adjust the opposite end until the digital level reads level. Mark the matching point on the other side.
Tip: If the rod is too flexible or too short to use as a guide, make two height marks and connect them with painter's tape or a lightly drawn line. Check the line with your digital spirit level before drilling.
3. Confirm the Bracket Spacing
Measure from the outer edge of the window frame to each bracket mark. The distances should match unless the window is intentionally offset in the wall. Also check that each mark is far enough from trim, molding, blinds, or nearby furniture.
If the rod will be wider than approximately 60 to 72 inches, consult the rod manufacturer’s guidance. Many long rods need a center support bracket to prevent sagging, particularly when holding heavy blackout curtains or layered drapery.
4. Drill Pilot Holes and Install Anchors
Once you are satisfied with the layout, drill pilot holes at the screw marks. For studs, use screws suited to the bracket and wood framing. For drywall without a stud, use anchors rated for the expected load.
Lightweight sheer curtains may work with basic anchors, but heavier curtains require more secure hardware. Toggle-style anchors or mounting directly into studs are generally better choices for substantial rods and thick drapes. Follow the anchor manufacturer’s drill-size and installation instructions.
5. Attach the Brackets
Screw the first bracket into place without fully tightening it at first. Attach the second bracket, then place the rod across both supports. Check the rod with the digital spirit level before final tightening.
If the reading shows a small tilt, loosen one bracket slightly and make a controlled adjustment. It is much easier to correct a minor issue now than after curtains and finials have been installed.
6. Add a Center Support When Needed
For a center bracket, find the midpoint between the side brackets rather than relying solely on the center of the window. Place the rod in the side brackets, position the center support beneath it, and verify that the support touches the rod without pushing it upward.
Check level again before fastening the center bracket. A center support installed too high can create a visible hump, while one installed too low will not prevent sagging.
7. Hang Curtains and Perform a Final Check
Install the curtain panels, rings, clips, finials, and tiebacks. Then step back several feet and inspect the finished look from different points in the room. Use the digital spirit level one final time on the rod itself.
Look for practical issues as well: make sure curtains clear the window sill, do not catch on blinds, and open fully without covering more glass than intended.
Common Curtain Rod Leveling Problems
Even a careful DIY project can run into a few complications. Here are practical fixes for common issues.
- The rod looks crooked but reads level: Check the window trim, ceiling line, and floor. Architectural features may not be level, so decide whether true level or visual alignment produces the best result.
- One bracket is loose: Remove the screw and replace an undersized or damaged anchor with one rated for the curtain weight.
- The rod sags in the middle: Add or reposition a center support bracket.
- Curtains bunch at one side: Confirm the rod is level, then inspect rings, clips, and panel weight distribution.
- Marks are correct but screw holes are not: Recheck the bracket template. The bracket’s center point and its screw-hole pattern are not always aligned.
Safety and Accuracy Tips
Use a stable ladder or step stool, especially when working above windows. Avoid standing on furniture, and keep the work area clear of children, pets, and loose hardware. If you suspect wiring or plumbing behind a wall, use appropriate detection tools and avoid drilling in uncertain locations.
For the best accuracy, take multiple readings instead of relying on one quick check. Verify the wall marks, the bare rod, and the fully installed rod. This simple repetition can catch errors caused by a shifting bracket, an uneven phone case, or a rod that has not settled correctly in its supports.
Make Curtain Installation Easier With Offline Measurement Tools
A digital spirit level is a convenient addition to a home-improvement toolkit because it is available when you are measuring, marking, or making a last-minute adjustment. Offline functionality is useful in rooms with weak reception, newly renovated spaces, garages, and rental properties where Wi-Fi may not be available.
For DIY tasks beyond window treatments, a measurement app can also help with shelves, picture frames, furniture setup, slopes, and basic navigation. An offline iOS tool such as Level Tool can keep practical measurement features accessible without requiring a subscription or a network connection.
Final Thoughts
To install curtain rods with a digital spirit level successfully, focus on careful planning, equal bracket placement, reliable wall support, and repeated level checks. The process is straightforward, but the details matter: a few minutes spent measuring and verifying can produce curtains that hang smoothly and make the entire room look more finished.
Whether you are mounting lightweight café curtains or heavy blackout drapes, a level rod provides the stable, balanced foundation your window treatment needs.
