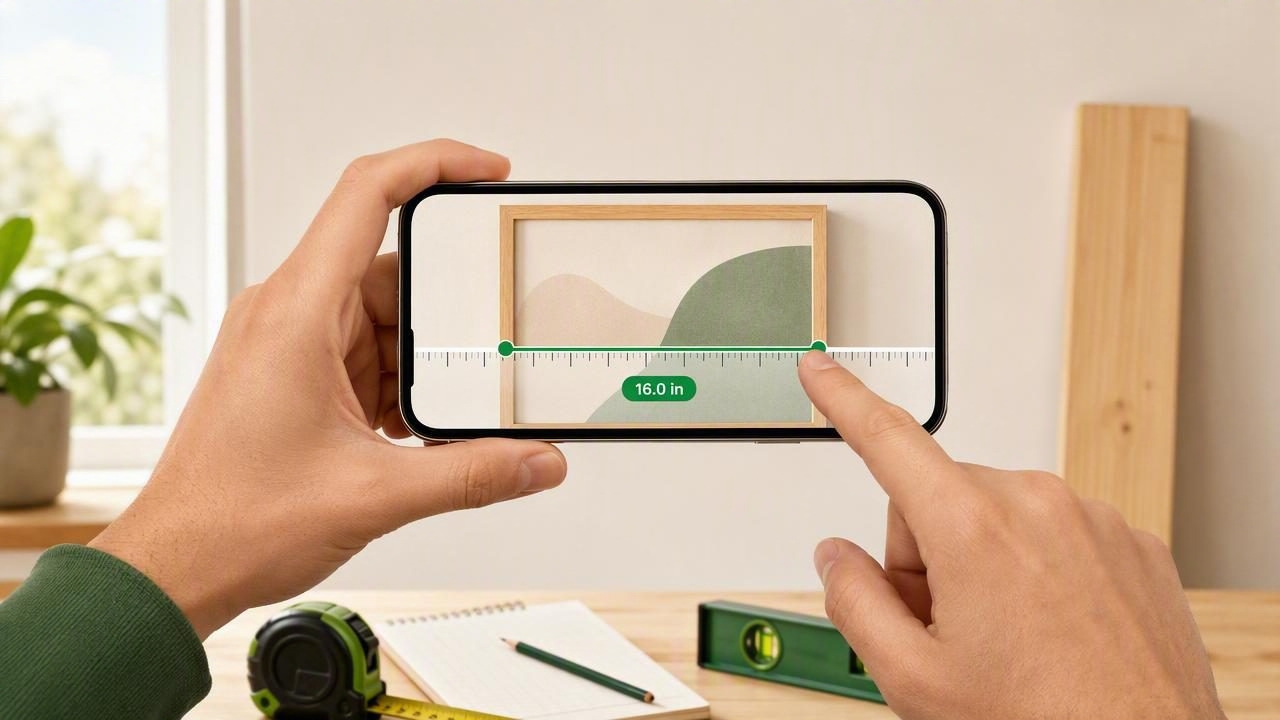
An iOS ruler can be a practical backup when a tape measure is downstairs, your toolbox is in the garage, or you need a quick dimension before buying materials. Whether you are measuring a screw, checking the width of a cabinet gap, marking a small cut line, or comparing furniture hardware, an iPhone ruler tool can help you estimate and record dimensions without carrying another device.
However, not every phone-based ruler works in the same way. Some use the physical screen as a ruler, while others use camera-based augmented reality (AR) to measure objects in a room. Knowing the difference—and understanding the limits of each method—will help you get more reliable results for DIY and home improvement work.
What Is an iOS Ruler?
An iOS ruler is a measurement tool that displays a graduated scale in inches, centimeters, or millimeters on an iPhone screen. It is most useful for measuring small, flat objects that can be placed directly against the display. Depending on the app or tool, an iOS ruler may also include a camera measurement mode for larger objects.
The two main types are:
- Screen rulers: A digital scale appears on the display. You place an item alongside the screen and read its length directly.
- AR rulers: The camera identifies points in physical space, allowing you to estimate the distance between them.
For small items, a calibrated screen ruler is generally the more straightforward option. For room dimensions, furniture, wall sections, and larger materials, AR measurement can be more convenient, although it should be checked against a tape measure before making a costly cut or purchase.
When an iPhone Ruler Is Most Useful
A ruler on iPhone is not intended to replace every workshop tool. Still, it can be extremely useful for quick checks, planning, and small-scale tasks. It is especially helpful when the required precision is modest and the measurement is easy to access.
Good Uses for a Screen Ruler
- Measuring screws, bolts, nails, anchors, and drill bits.
- Checking the width of picture hooks, brackets, hinges, and cabinet pulls.
- Measuring a small tile sample, trim piece, or hardware component.
- Estimating the dimensions of a crack, gap, or damaged surface.
- Comparing the size of items when shopping for replacement parts.
- Marking small craft, hobby, sewing, or model-making materials.
Good Uses for an AR Ruler
- Estimating the width of a doorway or window opening.
- Checking whether furniture may fit against a wall.
- Planning spacing for wall decor, shelves, or storage units.
- Roughly measuring a countertop, rug, table, or outdoor feature.
- Recording preliminary dimensions before returning with a tape measure.
Practical rule: Use an iOS ruler to plan, compare, and verify small details. Use a tape measure, steel rule, or caliper when a measurement affects cutting, drilling, structural fit, or expensive materials.
How to Measure Small Objects With an iOS Ruler
Using a screen ruler is simple, but careful positioning matters. The object must be flat and aligned with the ruler marks. Even a slight diagonal angle can make a short item appear longer than it really is.
- Clean the screen. Remove dust or fingerprints so the ruler markings are easy to read.
- Open the ruler view. Select inches, centimeters, or millimeters based on the project and the markings on your other tools.
- Place the object along the scale. Align one end with the zero mark rather than the edge of the phone or a screen bezel.
- Keep the object parallel. Match the long edge of the object with the ruler line. Do not measure on a diagonal.
- Read the far edge. If the item begins at zero and ends at 42 mm, its length is 42 mm.
- Repeat the check. Rotate or reposition the object and measure once more if the dimension matters.
For very small parts, use the finest available markings. Millimeters are often more useful than fractions of an inch when matching hardware or checking drill-bit sizes.
Why Calibration Matters
iPhone models have different screen sizes, resolutions, and display dimensions. A ruler graphic that looks correct on one device may not be physically accurate on another unless the app accounts for the screen’s actual size. That is why calibration is one of the most important features to look for in an iOS ruler.
Calibration adjusts the on-screen scale to match a known real-world object. Many ruler tools let you use a bank card, identification card, or another standardized item as a reference. A standard payment card is typically 85.60 mm wide, which makes it a useful comparison object.
A Simple Calibration Process
- Place a known-size reference item flat against the screen.
- Adjust the ruler scale until the displayed measurement matches the item.
- Save the calibration for your device if the tool supports it.
- Test the result with a second object, such as a metal ruler.
Calibration is particularly valuable after changing display settings, installing a new app, or moving to a different iPhone. It is also wise to confirm accuracy before measuring hardware that must fit precisely.
Screen Ruler vs. AR Measurement: Which Is More Accurate?
Accuracy depends on the size of the object, lighting conditions, the device, and how the measurement is taken. In general, a screen ruler can be quite dependable for short measurements because the object is physically aligned against a fixed scale. AR measurement is more flexible, but it relies on camera tracking and depth estimation.
| Measurement Method | Best For | Strengths | Limitations |
|---|---|---|---|
| Screen ruler | Small, flat objects | Fast, clear, useful for hardware | Limited by screen length; needs calibration |
| AR ruler | Furniture, walls, openings | Measures larger spaces without contact | Can vary with lighting, surfaces, and tracking |
| Tape measure | Most home improvement jobs | Reliable, inexpensive, long range | Less convenient when unavailable |
| Caliper | Fine hardware and material thickness | High precision for small dimensions | Specialized tool; limited range |
Tips for Better iOS Ruler Accuracy
Small habits can make a meaningful difference in the quality of phone-based measurements. Follow these tips before relying on a result.
- Measure from zero: Avoid using the phone edge as a starting point because bezels and rounded corners are not measurement references.
- Use a flat surface: Curved, flexible, or uneven objects can be difficult to align accurately on a screen.
- Check both units: Confirm whether you are reading centimeters, millimeters, decimal inches, or fractional inches.
- Keep a real rule nearby: Compare occasional results with a physical ruler to spot calibration problems.
- Do not force objects onto the display: Sharp metal pieces, rough materials, and dirty hardware can scratch the screen. Use a screen protector or measure beside the device when appropriate.
- Allow tolerance: For fitting parts, leave room for measurement variation and verify the final size with a physical tool.
Common DIY Situations and the Right Measurement Tool
Choosing the appropriate tool saves time and prevents mistakes. An iOS ruler is ideal for convenience, but the job should determine the method.
- Replacing a cabinet knob: Use a screen ruler to estimate the screw length or hole spacing, then confirm with a tape measure or caliper before ordering.
- Buying a replacement screw: Measure the screw shaft and head with an on-screen millimeter scale for a quick store reference.
- Hanging a frame: Use an AR ruler to plan approximate placement, then use a tape measure and level to mark final positions.
- Cutting wood trim: Use a physical tape measure for the cut length. A phone ruler may help identify the width of a sample or molding profile.
- Checking a wall gap: Use a screen ruler for narrow gaps that can be accessed safely, or use a feeler gauge for precision work.
Can an iOS Ruler Work Offline?
Yes. A screen-based ruler does not need an internet connection because it only uses the device display and local software. Many camera-based measurement features can also function without mobile data once the app is installed, though performance and available features vary by tool.
Offline functionality is useful in basements, workshops, job sites, storage buildings, and outdoor areas with weak reception. It also means you can access basic measurement tools without relying on a subscription service or cloud connection. Before a project, open the app once and make sure the ruler, calibration settings, and preferred units are available locally.
Build a More Useful iPhone DIY Toolkit
A ruler is most valuable when it works alongside other measurement tools. For example, you may use a ruler to check a bracket, a bubble level to align it, and a compass to orient an outdoor project. Combining tools helps you move from rough planning to a more confident installation.
For users who want several practical tools in one offline iOS app, Level Tool includes a calibrated ruler alongside leveling, navigation, and other sensor-based utilities. Regardless of the app you choose, treat your phone as a convenient measurement companion and verify critical dimensions with dedicated tools.
Final Takeaway
An iOS ruler is a fast, portable solution for measuring small objects, checking hardware, and making preliminary DIY plans. The key is to use a calibrated screen scale, align objects carefully, select the correct unit, and understand when a tape measure or caliper is necessary. With realistic expectations, a ruler on your iPhone can reduce interruptions and keep everyday home improvement projects moving.
