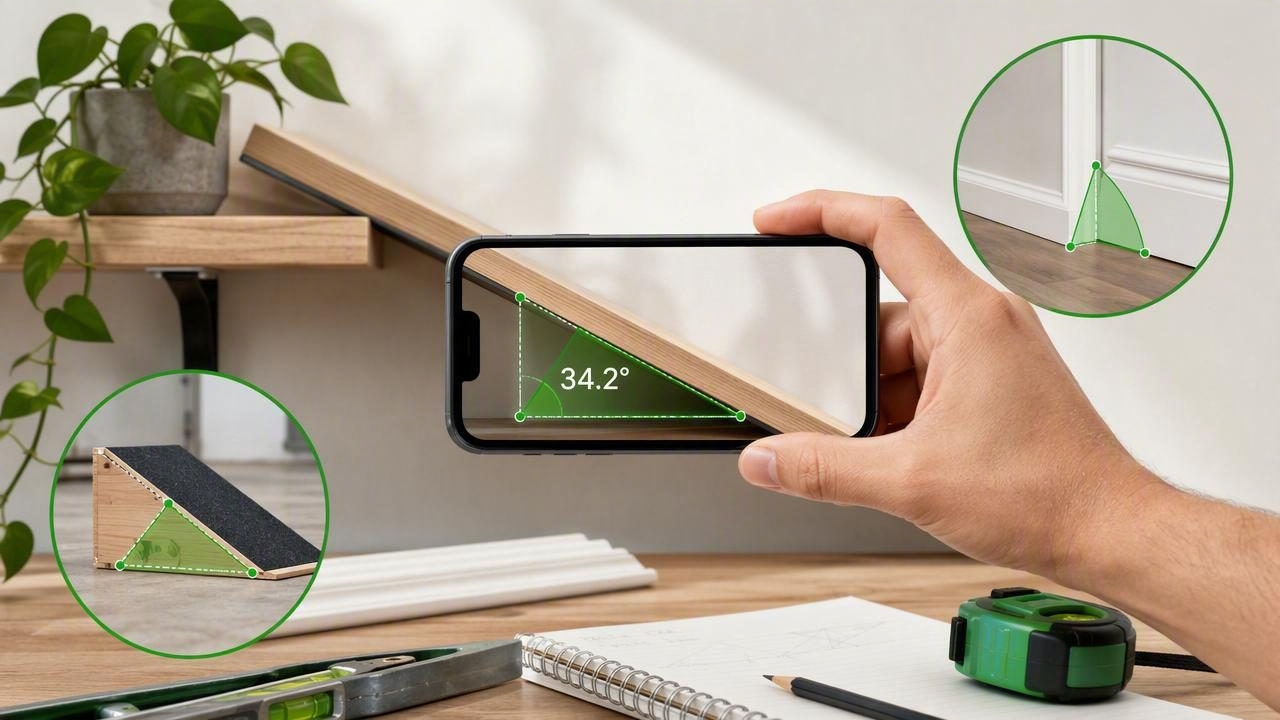
Learning how to measure angles on iPhone can make many DIY tasks easier, from checking a shelf bracket to setting a drainage slope or matching an existing trim angle. Modern iPhones contain motion sensors that can detect tilt and orientation, allowing a level or angle meter app to display degrees, slope, and level status.
However, a useful reading depends on more than opening an app and looking at the screen. The phone must contact the surface correctly, the reference point must be understood, and repeated measurements should agree before you rely on the result. This guide explains a practical process for measuring angles with an iPhone, including calibration, reference methods, real-world examples, and important limitations.
What an iPhone angle meter actually measures
An iPhone angle meter uses the device's built-in motion sensors to estimate how the phone is tilted relative to gravity. When the phone rests on a surface, its orientation can be shown as an angle in degrees. A reading of 0° generally means level on the selected axis, while a positive or negative value indicates tilt in one direction or the other.
This makes an iPhone useful for checking:
- The level of shelves, countertops, picture frames, and appliances
- The pitch of a ramp, walkway, roof model, or drainage channel
- The angle of a board before cutting or fastening
- The tilt of an RV, camper, trailer, or portable workbench
- Whether two surfaces have a matching angle
It is important to distinguish between measuring tilt and measuring every possible geometric angle. An iPhone angle meter is especially effective when the phone can sit flat against, or directly on, the surface being checked. It does not replace specialized instruments for every job, particularly where certified measurements, long-distance alignment, or tight professional tolerances are required.
Choose the right reference before you start
Before you measure an angle on iPhone, decide what the number should be relative to. This is the most common source of confusion in DIY angle measurements.
| Reference type | What it means | Useful DIY example |
|---|---|---|
| Gravity or true level | The surface is compared with horizontal level. | Checking whether a shelf is level. |
| True vertical | The surface is compared with a vertical plane. | Checking whether a stud or post is plumb. |
| Relative reference | A known surface becomes the zero point. | Matching the angle of an existing stair rail. |
| Target angle | You work toward a specified degree value. | Setting a 2° drainage fall on a small outdoor surface. |
For example, a workbench may not be perfectly level because the garage floor slopes. If you need to cut two support pieces at the same angle as the bench top, a relative reference is more useful than gravity. Set the bench top as zero, then measure each support against that reference.
How to measure angles on iPhone accurately
- Clean the contact surfaces. Remove dust, loose debris, or thick material that could stop the phone from sitting consistently. A tiny bump beneath the device can change the reading.
- Use a stable, flat side of the phone. Place the phone so a broad, consistent edge or back contacts the surface. Avoid balancing it on buttons, a camera bump, or an uneven case.
- Remove the case if needed. Thick, flexible, or uneven cases can create a gap and make contact unreliable. If you keep the case on, use the same contact position each time.
- Calibrate on a known reference. If your task needs a relative angle, place the phone on the chosen baseline and set it to zero. For level work, use a surface you have independently verified as level when possible.
- Wait for the reading to settle. Set the phone down gently, release it, and give the display a moment to stabilize. Do not judge the number while the device is still moving.
- Read the correct axis. A dual-axis display can show tilt in two directions. One axis may be level while the other still has side-to-side lean.
- Repeat the measurement. Lift the phone, place it back in the same position, and compare the result. Repeatability is more meaningful than a single convenient reading.
Many angle meter interfaces provide a target setting, tolerance indicator, sound, or haptic feedback. These features can be helpful when your eyes are focused on shims, fasteners, or a saw fence instead of the display. They are guidance tools, though: the surface contact and calibration method still determine whether the measurement is useful.
A concrete example: setting a small drainage slope
Suppose you are installing a narrow outdoor channel beside a shed and want water to move away from the wall. Your plan calls for a gentle fall of approximately 2°. Instead of trying to estimate the slope by eye, you can use your iPhone as an angle reference during setup.
- Place a straight board along the direction the water should travel.
- Ensure the board is supported firmly so it does not flex under the phone.
- Put the iPhone flat on the board with a consistent edge aligned along the slope direction.
- Check the reading against gravity, not against the ground nearby.
- Raise or lower the far end in small increments until the display is near 2°.
- Measure again after tightening or securing the supports, since fastening can alter the angle.
- Turn the phone around and repeat the measurement from the opposite direction as a quick consistency check.
If the two measurements are materially different, stop and investigate. The board may be warped, the phone may be sitting on an obstruction, or the contact point may be inconsistent. Do not average obviously conflicting numbers and assume the result is correct.
Also check side-to-side level. A channel can have the intended downhill fall while still leaning sideways, which may cause water to collect or flow in an unintended direction.
Calibration and repeatability: the two habits that matter most
Calibration establishes what your app should treat as zero. Repeatability confirms that your setup is producing dependable readings. Together, these habits help you avoid false precision.
When to calibrate
Calibrate when you are measuring relative to a particular object, such as an existing handrail, cabinet top, or machine bed. You may also want to recalibrate after changing cases, switching contact sides, or moving to a different reference surface.
Do not calibrate casually on a surface simply because it looks level. If that surface is actually tilted, every later measurement will inherit the same error. For work that must be level to gravity, use a verified level reference rather than an assumed one.
How to test repeatability
Take three readings with the phone placed in the same orientation and location. Then rotate it 180 degrees on the same surface and repeat. The values should be reasonably consistent for the task at hand. If they jump around, improve the setup: remove the case, clean the surface, use a straighter board, or keep the phone from rocking.
Practical rule: Treat an angle reading as a decision aid only after you can reproduce it. A stable 1.8° reading is usually more useful than a one-time display of 2.0° that cannot be repeated.
Common mistakes when using an iPhone angle meter
- Measuring across the wrong direction: Align the phone with the slope or edge you intend to measure, not diagonally across it.
- Ignoring the camera bump or case: Uneven contact can create a misleading angle. Use a flat contact plane whenever possible.
- Checking only one axis: A shelf can be level from left to right but tipped forward or backward.
- Using a short, warped reference: A bowed board can give different readings at different points. Use a sound straightedge for layout work.
- Confusing degrees with percentage grade: These are related but not identical. A 45° angle equals a 100% grade, while a small degree value can still represent a meaningful slope over a long distance.
- Relying on a screen held in midair: For most DIY tasks, direct physical contact is more repeatable than trying to visually align the phone with a distant surface.
Degrees, slope, and practical tolerances
Degrees are easy to use for many household projects because they describe the surface's tilt directly. Still, your acceptable tolerance depends on the task. A decorative frame may look fine with a very small difference, while cabinetry, appliance leveling, tile drainage, and finish carpentry can require closer control.
Set a tolerance before beginning. For example, you might decide that a shelf is acceptable when the reading is close to 0° and stays consistent after the final screws are tightened. For a planned slope, set the intended target and make adjustments gradually rather than making large changes based on one reading.
Remember that an iPhone measurement is not a certified survey, engineering, or safety inspection result. If a measurement affects structural decisions, regulated work, critical drainage design, accessibility requirements, or safety-sensitive equipment, follow applicable specifications and use the appropriate professional instrument or qualified assistance.
Use an offline angle tool when the job takes you away from Wi-Fi
DIY work often happens in garages, basements, yards, campsites, and unfinished spaces with unreliable connectivity. Core angle measurements do not need an internet connection when the app relies on the phone's onboard sensors. Offline functionality also helps you keep working without needing to sign in or wait for a connection before checking a surface.
For a focused walkthrough of calibration, targets, and practical readings, Level Tool's guide to measuring angles on iPhone offers additional context for using an iPhone angle meter during home improvement and navigation tasks.
Final checklist before trusting an angle reading
- Is the phone making full, stable contact with the surface?
- Have you selected the correct reference: level, vertical, or relative zero?
- Did you calibrate against a reference you trust?
- Did you check both axes where side-to-side tilt matters?
- Can you reproduce the same reading after repositioning the phone?
- Is your chosen tolerance appropriate for the project?
When you combine careful contact, a clear reference, calibration, and repeat measurements, it is practical to measure angles on iPhone for a wide range of everyday tasks. The device is most useful not as a substitute for every specialist tool, but as a convenient, sensor-based measurement aid that helps you make informed adjustments wherever your project takes place.
