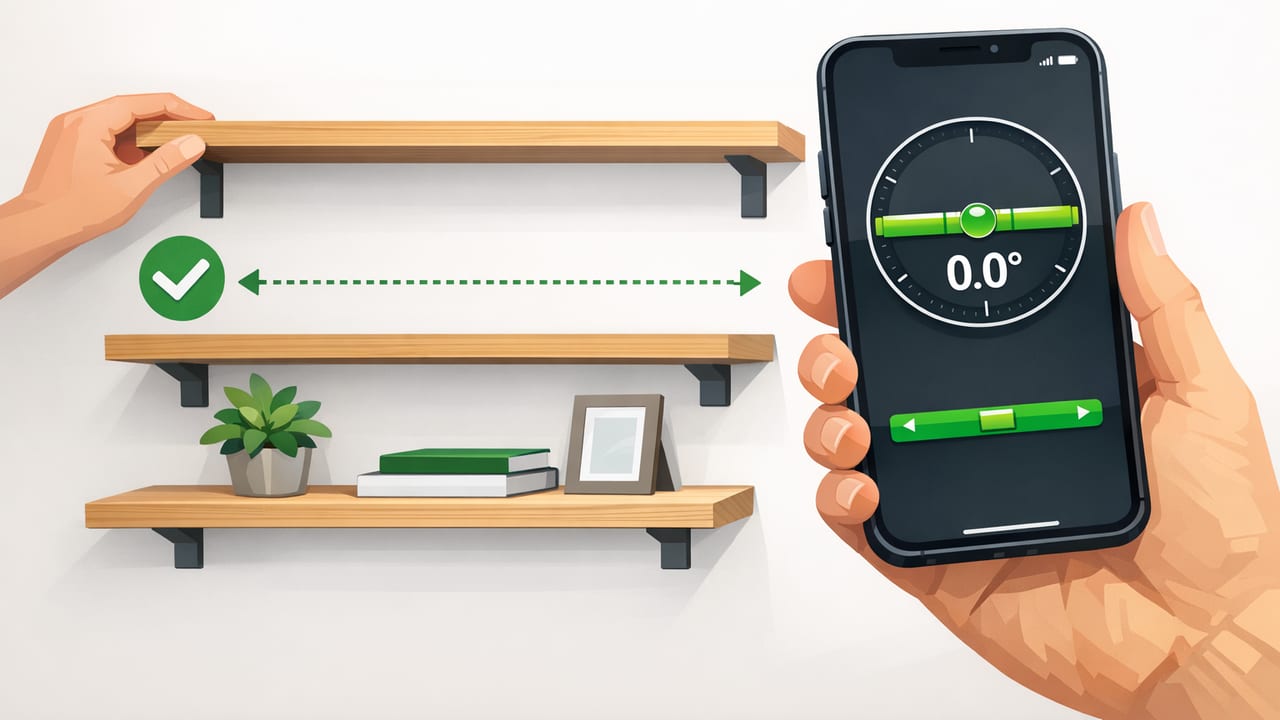
A shelf that’s even a little out of level will show it: books lean, décor “drifts,” cabinet doors look misaligned, and your eye keeps getting pulled to the same annoying line. The good news is you can get clean, professional results without hauling out a big spirit level—if you use your iPhone’s sensors correctly.
This guide teaches you how to align shelves using phone inclinometer workflows that actually hold up in real rooms (old walls, imperfect studs, bowed lumber, and all). You’ll learn how to prep, measure, mark, install, and verify—plus how to troubleshoot the most common causes of “why is this still not level?”
What a phone inclinometer does (and what it doesn’t)
An inclinometer uses your phone’s motion sensors to measure angle relative to gravity. For shelf work, that typically means confirming 0.0° (perfectly level) or matching a reference angle when the wall or floor isn’t perfectly true.
- Great for: checking level across a shelf, setting bracket heights, matching angles, verifying a run of multiple shelves.
- Not ideal for: measuring long spans when the shelf is badly bowed, or when the phone can’t sit flat on the surface.
Pro mindset: You’re not just “checking level.” You’re building a repeatable reference so every bracket and shelf agrees with the same baseline.
Tools and materials checklist
You can do this with minimal gear, but the right extras make it faster and more accurate.
- iPhone with an inclinometer/level feature (offline-capable is a plus)
- Painter’s tape (for marking without scuffing)
- Pencil + measuring tape
- Drill/driver + appropriate bits
- Anchors (if not hitting studs) or screws for studs
- Stud finder (optional but helpful)
- Shims (thin wood/plastic) for fine leveling
- A straightedge (optional) for verifying bowed shelves
Before you start: accuracy habits that matter
1) Pick the “reference surface” you trust
Your inclinometer reads the phone’s angle, so your reading is only as good as what the phone is sitting on. Use a surface that’s:
- flat (no beveled edges)
- clean (no grit under the phone)
- wide enough that the phone sits stable
2) Calibrate (or zero) on a known level surface
If your app supports calibration/zeroing, do it. If you don’t have a known level surface, you can still create a reliable baseline using a flip method:
- Place the phone on a flat surface and note the reading.
- Rotate the phone 180° on the same spot (keep it in the same place).
- If the readings are equal and opposite (e.g., +0.2° and −0.2°), your baseline is consistent. If not, re-zero if possible and repeat.
3) Remove phone cases that rock
Many cases have a raised lip or camera bump that prevents full contact. If the phone teeters, your readings will drift. For shelf installation, a bare phone (or a flat-backed case) is more reliable.
Step-by-step: align a single shelf with a phone inclinometer
Step 1: Mark your shelf height and span
Use painter’s tape on the wall where the shelf will go. Mark the desired height on the tape. If you’re installing a long shelf, mark both ends of the intended run so you’re not “eyeballing” the final position.
Step 2: Find studs (or decide on anchors)
For heavy loads, aim for studs. If the design forces you between studs, choose anchors rated for the load (and consider reducing span or adding brackets).
Step 3: Set the first bracket perfectly level
Hold the first bracket where it will mount. If the bracket has a horizontal top, you can rest the phone directly on that edge; otherwise, place a straightedge across the bracket and set the phone on the straightedge.
Adjust the bracket until the inclinometer reads 0.0° (or as close as your app displays). Mark the screw holes.
Step 4: Drill and fasten (but leave a little play)
Drive the first screw snug, but not fully tight if you may need micro-adjustments. This is especially helpful on drywall anchors where the bracket can shift a hair during tightening.
Step 5: Transfer the level line to the second bracket location
Here’s the key: don’t measure “up from the floor” on both sides unless you know the floor is level. Instead, measure from the first bracket or use your phone to confirm a level reference.
- Temporarily place the shelf on the first bracket.
- Set your phone on the shelf surface and adjust the far end until the inclinometer reads 0.0°.
- While holding that position, mark the second bracket height on the wall (use tape for clear marks).
Step 6: Install the second bracket, then verify across the shelf
Install the second bracket at your marks. Place the shelf on both brackets and take readings:
- Across the depth (front-to-back) to catch tilt
- Across the length (left-to-right) for level
If the shelf reads level but “looks off,” the wall or ceiling line may be out of square; trust the inclinometer for functional level, then adjust visual alignment only if aesthetics matter more than gravity-correct level (e.g., aligning with nearby trim).
How to align multiple shelves so they match each other
When you have a stack of shelves, the goal is consistency. Even tiny differences become obvious when repeated.
Method A: Build a repeatable bracket template
- Install the first shelf level using the steps above.
- Measure the vertical spacing you want between shelves.
- Use a story stick (a strip of wood/cardboard) marked with your spacing to transfer heights.
- At each new height, set brackets using the inclinometer rather than trusting the wall’s “straightness.”
Method B: Reference a single baseline angle
If you’re working in a space where “level” is less important than matching an existing feature (like a slightly sloped ceiling beam), you can match that angle instead:
- Take an inclinometer reading on the feature.
- Set your shelves to the same angle for visual alignment.
What tolerance is “good enough” for shelves?
Small angle errors can turn into noticeable height differences across a span. Use the table below as a practical guide.
| Span (length) | Angle error | Approx. height difference | Visible impact |
|---|---|---|---|
| 24 in (61 cm) | 0.2° | ~0.08 in (~2 mm) | Usually fine |
| 36 in (91 cm) | 0.3° | ~0.19 in (~5 mm) | Sometimes noticeable |
| 48 in (122 cm) | 0.5° | ~0.42 in (~11 mm) | Often noticeable |
| 72 in (183 cm) | 0.5° | ~0.63 in (~16 mm) | Very noticeable |
If you want the math behind the estimate:
height_difference ≈ span × tan(angle_in_radians)
angle_in_radians = angle_in_degrees × (π/180)
Troubleshooting: why your shelf still isn’t level
Problem 1: The reading changes when you move the phone
Cause: bowed shelf, textured surface, or the phone isn’t sitting flat.
Fix: place a straightedge on the shelf and put the phone on the straightedge; take multiple readings along the span and average your judgment.
Problem 2: It’s level left-to-right but tilts forward
Cause: bracket isn’t square, wall surface is uneven, or one bracket is twisted.
Fix: check front-to-back angle on the shelf; shim behind one bracket (between bracket and wall) to correct the tilt, then retighten.
Problem 3: It was level before tightening, then drifted
Cause: screws pulled the bracket while tightening (common with drywall anchors).
Fix: tighten incrementally, re-check between turns, and consider a different anchor type or pre-drilling to reduce walk.
Problem 4: Two shelves are individually level but don’t “line up” visually
Cause: the floor/ceiling/trim is out of level, creating a visual illusion.
Fix: decide which reference matters: true level (best for function) or alignment to a nearby architectural line (best for aesthetics). If you choose aesthetics, match that line’s angle consistently for all shelves.
Safety and load notes (quick but important)
- Use the right fasteners: a perfectly level shelf can still fail if anchors are underrated.
- Bracket spacing matters: longer shelves need more support to prevent sag (sag can mimic “out of level”).
- Re-check after loading: if the shelf deflects under weight, add a bracket or reduce the load.
Workflow recap (the fast version)
- Calibrate/zero your phone inclinometer if available.
- Install the first bracket level.
- Use the shelf itself + inclinometer to transfer a true level mark to the second bracket location.
- Install the second bracket, verify lengthwise and front-to-back.
- Shim if needed, then tighten fully and re-check.
Choosing an offline inclinometer/level app
For home improvement work, an offline app is practical: garages, basements, and job sites don’t always have reliable reception, and you don’t want pop-ups or forced sign-ins when you’re mid-install. Look for features like dual-axis readings, easy calibration, clear degree display, and stable UI that’s readable at arm’s length.
If you’re looking for an all-in-one iOS measurement toolkit that includes an inclinometer/level among other tools and works fully offline, Level Tool is one option to consider.
