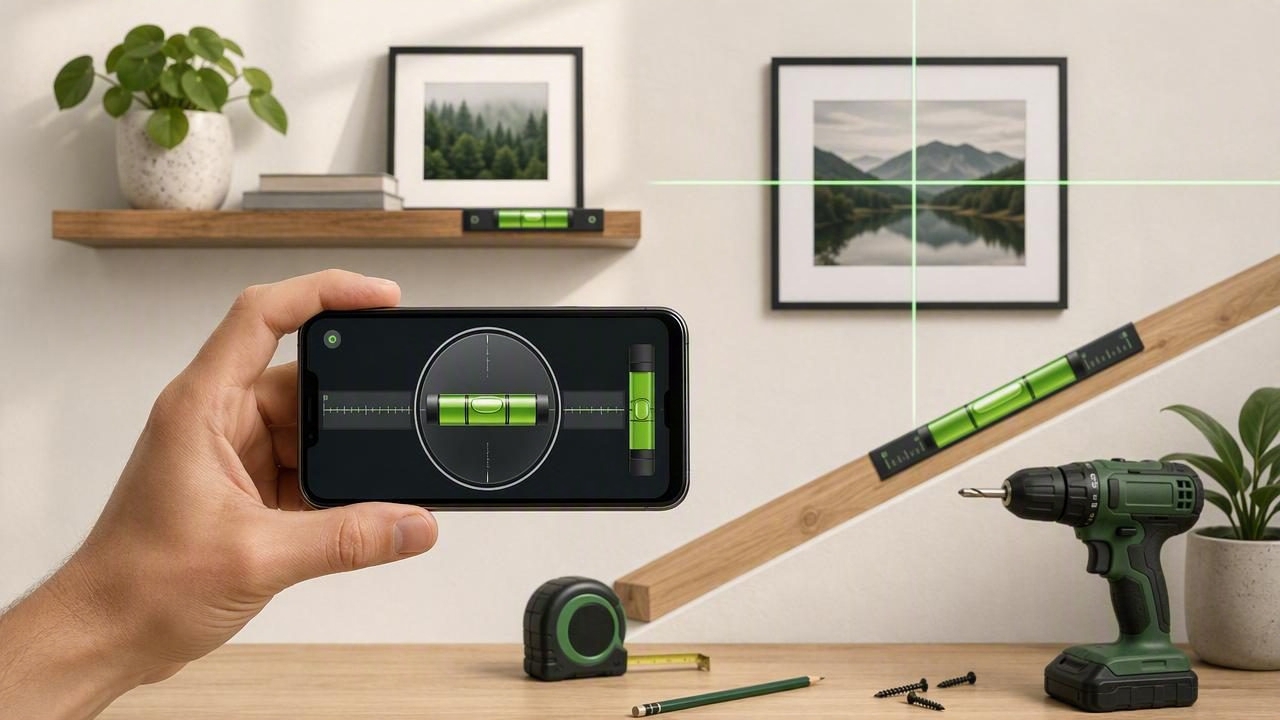
Finding the best level app iOS users can depend on is not simply about choosing the app with the most features. For DIY work, a useful level app needs to provide clear readings, allow sensible calibration, work reliably without a connection, and make it easy to repeat a measurement before committing to a hole, cut, or installation.
An iPhone can be a practical measurement tool because it contains motion sensors that detect orientation. A level app translates that sensor data into familiar information: a bubble-style display, horizontal and vertical alignment, or a numerical angle. Used correctly, it can help with common home improvement tasks such as hanging shelves, adjusting furniture, checking a picture frame, or setting a gradual drainage slope.
However, an app is only one part of the process. The phone must touch the surface correctly, the reference surface must be trustworthy, and the reading should be checked more than once. This guide explains what to look for, how to use a level app responsibly, and where an iPhone should not replace dedicated professional equipment.
What Makes a Good iPhone Level App?
The best level app for your needs depends on the type of work you do. Someone hanging a single mirror may only need a straightforward bubble level. A person installing cabinets, building a garden structure, or checking an RV may benefit from angle readings, target values, tolerance settings, and feedback that can be used while looking away from the screen.
Prioritize the following features when comparing iOS measurement tools:
- Dual-axis leveling: Shows whether a surface is level in more than one direction. This is particularly helpful for tabletops, appliances, and other surfaces that can tilt front-to-back and side-to-side.
- Numerical angle readings: A degree display helps when a project needs a deliberate incline rather than a perfectly level result.
- Calibration controls: Lets you establish a reference when a known level surface is available or compensate for a consistent setup.
- Targets and tolerance: Useful when you need to reach a specific angle, such as 2° or 5°, rather than 0°. A tolerance prevents tiny fluctuations from becoming distracting.
- Sound and haptic feedback: Can indicate when you are close to level without requiring constant attention to the display.
- Offline functionality: Core level readings should remain available in a garage, basement, yard, campsite, or other place with weak service.
- Clear visual design: Large digits, readable bubbles, and high-contrast indicators reduce mistakes in bright daylight or awkward working positions.
Extra tools such as a compass, ruler, or barometer may be useful in an all-purpose measurement app, but they should not distract from the quality of the level and angle functions you will use most often.
Understand How iPhone Level Measurements Work
iPhone level apps generally use the device's built-in motion sensors to determine its orientation relative to gravity. When the phone is placed flat on a surface, the app can show whether that surface is level. When the phone is held against a vertical object, it can indicate whether the object is plumb. Rotating the phone can also reveal an angle relative to a selected reference.
This method is convenient, but it creates an important rule: the phone is the measuring surface. The result is only as meaningful as the contact between the iPhone and the item being measured.
A thick or uneven case, a protruding camera area, dirt on the workpiece, a warped board, or a phone balanced on a narrow edge can all affect repeatability. For the most consistent result, remove any case that prevents flat contact and place the phone in the same orientation for every check.
Level, Plumb, and Angle Are Not the Same Task
| Measurement | What It Means | Common DIY Use |
|---|---|---|
| Level | Horizontal relative to gravity | Shelves, countertops, appliance tops |
| Plumb | Vertical relative to gravity | Wall decor, posts, door trim |
| Angle | A measured tilt from a reference | Ramps, drainage, roof components |
Knowing which result you need prevents a common mistake: trying to make a surface perfectly level when the plan actually calls for a controlled slope.
Calibration: When It Helps and When It Does Not
Calibration is one of the most valuable options in a level app, but it should be used carefully. Calibration does not turn an unknown surface into a proven level surface. Instead, it tells the app to treat a selected position as the reference point.
For example, you might calibrate on a known level workbench before checking whether a shelf board is aligned with it. Or, if you are building a simple jig and want several pieces to match the same intentional angle, you can establish that angle as your reference.
Before calibrating, check the reference surface in more than one position. Place the phone down, note the reading, rotate it 180 degrees on the same spot, and compare. If the readings change substantially, inspect the surface and phone contact before relying on it as a reference.
Practical principle: Calibration improves consistency against a known reference; it does not independently verify that the reference is truly level.
If you need to confirm a critical construction datum, use an appropriate professional reference tool and follow the relevant building requirements. An iPhone app is especially useful for setup, quick checks, and repeated DIY measurements, but it is not a substitute for certified surveying or inspection equipment.
A Concrete Example: Installing a Floating Shelf
Consider a 36-inch floating shelf that will hold books. In this situation, a small visible tilt can look wrong and may encourage objects to slide toward one end. Here is a practical workflow using a level app.
- Inspect the wall and bracket: Make sure the bracket is seated correctly and that no debris is trapped between it and the wall.
- Use flat contact: Remove a bulky case if it stops the iPhone from sitting flat against the shelf or bracket.
- Take a first reading: Place the phone near the center of the shelf. Note whether it shows a left-right tilt.
- Adjust gradually: Move the shelf or bracket as needed. If the app offers a target of 0°, select it, and use a sensible tolerance rather than chasing every tiny change.
- Check both ends: Move the phone to the left and right portions of the shelf. A shelf can appear level at the center while a warped board or uneven mounting point changes the reading elsewhere.
- Repeat after tightening: Fasteners can shift a bracket slightly as they are tightened. Recheck the shelf after the final adjustment.
- Use a visual check: Step back and compare the shelf to nearby architectural lines, while remembering that floors, ceilings, and trim may not themselves be level.
This example demonstrates why repeatability matters more than a single reading. If the same phone position produces similar results across multiple checks, you have stronger reason to trust the setup.
Why Targets, Tolerance, Sound, and Haptics Matter
A simple bubble display is enough for many jobs, but a target angle can make specialized work easier. Suppose a surface needs a modest slope to move water away from a structure. Instead of guessing by eye, you can set the required target angle and approach it deliberately.
Tolerance is equally important. Real-world surfaces and hand movements can produce tiny shifts in the displayed number. A narrow acceptable range lets you work efficiently without reacting to insignificant fluctuations. For a shelf, you may aim for level. For a drainage project, you may aim for the specified slope and verify it at several points.
Sound and haptic feedback can improve usability when your hands are occupied or the phone is positioned where viewing the screen is inconvenient. Treat these cues as guidance, not proof. Always confirm the final display and repeat the measurement after securing the item.
Offline Use Is a Practical DIY Requirement
Many projects happen in places where a stable internet connection is not guaranteed: sheds, garages, new construction sites, basements, outdoor areas, and campsites. A dependable level function should not require you to sign in, load a webpage, or maintain a signal to read an angle.
Offline functionality is also helpful for privacy and convenience. You can open the measurement tool when needed and focus on the project rather than troubleshooting connectivity. Before starting important work, open the app once and confirm that its core level and angle tools are available without a network connection.
Limitations to Keep in Mind
An iPhone level app is useful, but it has boundaries. Do not use one as the only basis for structural decisions, regulated construction work, safety-critical installations, or work requiring certified accuracy. It also cannot confirm what is happening inside a wall, determine whether an object is securely fastened, or automatically level and lift a vehicle.
Likewise, a level app does not make photo-based measurements reliable simply by pointing the camera at an object. For leveling, the device needs meaningful physical contact with the surface or a carefully controlled mounting arrangement. If the phone cannot sit stably against the item, use a straight, flat reference edge and place the phone on that instead.
For long runs, check multiple locations. A floor may be level near one wall and dip in the middle. A long board may twist. A single point reading cannot describe every variation across a large surface.
Final Checklist for Choosing and Using a Level App
- Choose an app with a readable bubble level and numerical angle display.
- Look for calibration, target angle, and tolerance options if your projects require them.
- Confirm that core measurements work offline.
- Ensure the iPhone makes stable, direct contact with the measuring surface.
- Repeat readings in the same position and check multiple points on longer materials.
- Use a verified reference before calibrating.
- Reserve professional tools for certified, structural, or safety-critical work.
For DIY users who want an offline set of iOS measurement tools, Level Tool’s guide to measuring an angle on iPhone provides additional context on using phone contact, reference points, and repeat checks effectively.
