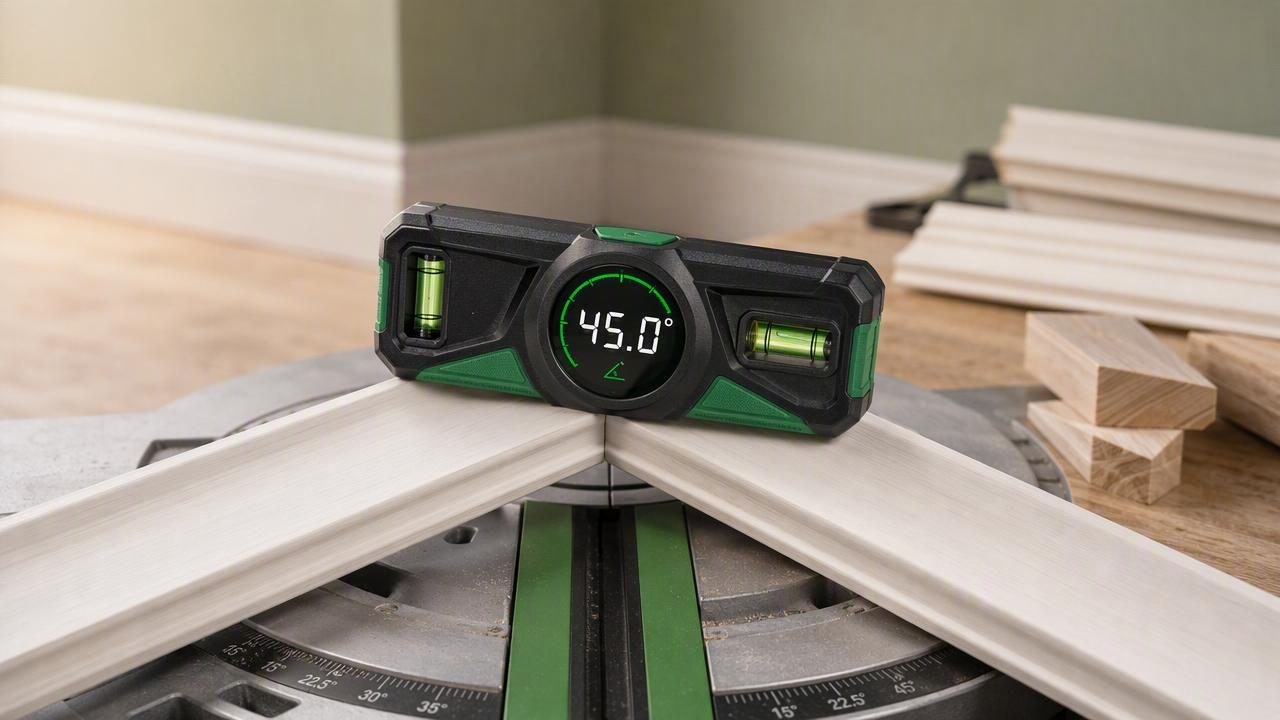
Finding the best haptic level tool to measure a miter angle can make trim work, woodworking, framing, and home improvement projects much easier. A small error in an angle measurement can create visible gaps in baseboards, crown molding, picture frames, or casing joints. While a traditional bevel gauge and protractor remain useful, an iPhone level app with haptic feedback gives DIYers a fast, portable way to check angles without constantly watching a screen.
Haptic feedback adds a practical advantage: your phone can vibrate when you reach a target angle or a level position. That means you can focus on holding the phone steady, adjusting a workpiece, or positioning a miter saw rather than repeatedly looking down at a display. Used correctly, a sensor-based level tool can help you measure, transfer, and verify miter angles with greater confidence.
What Is a Miter Angle?
A miter angle is the angle cut across the face or width of a board. It is commonly used to join two pieces of trim around a corner, create a frame, or form angled transitions in woodworking. The most familiar example is a 45-degree miter: two boards cut at 45 degrees create a 90-degree corner when joined.
However, real walls and corners are not always perfectly square. A corner that appears to be 90 degrees may actually measure 88 or 94 degrees. In those cases, cutting two 45-degree miters can leave an open joint. Measuring the actual corner and dividing that result by two helps determine the proper miter saw setting.
| Measured Corner Angle | Typical Two-Piece Miter Cut | Example Use |
|---|---|---|
| 90 degrees | 45 degrees per board | Standard picture frame or square room corner |
| 88 degrees | 44 degrees per board | Slightly tight inside corner |
| 94 degrees | 47 degrees per board | Open corner in older construction |
| 135 degrees | 67.5 degrees per board | Octagonal trim or angled feature wall |
It is important to distinguish a miter angle from a bevel angle. A miter cut changes the left-to-right angle of the saw table or workpiece. A bevel cut tilts the blade relative to the board face. Many finish carpentry projects use one or both, so confirm which angle you need before making a cut.
Why Haptic Feedback Helps When Measuring Angles
A standard digital level app displays angle readings visually. A haptic level tool adds physical vibration cues through the iPhone. This is especially useful when you are working in a cramped area, holding trim against a wall, or trying to keep the device stable on a saw fence.
- Less screen checking: Vibration can indicate that you have reached level, plumb, or a selected target angle.
- Better concentration: You can keep your hands and eyes focused on the board, wall, or saw setup.
- Accessible feedback: Physical alerts can be useful in loud workshops or for users who prefer nonvisual cues.
- Faster repeat positioning: Haptic confirmation helps when checking multiple pieces at the same angle.
Haptics should not be treated as the only source of information. They are most useful alongside a clear numerical angle display, a readable level bubble, and proper calibration. Think of vibration as a confirmation signal rather than a replacement for checking the measurement.
Features to Look for in a Haptic Level Tool
The best tool for measuring miter angles combines responsive feedback with reliable sensor readings and a practical interface. Whether you use a dedicated digital angle finder or an iOS app, look for the following capabilities.
1. Precise Angle Readings
Your tool should show angles in degrees with enough decimal precision for the work at hand. For rough framing, whole-degree readings may be sufficient. For finish trim, cabinetry, and tight visible joints, decimal readings can help you identify small deviations and test-fit more accurately.
2. Calibration Controls
Smartphone sensors can be affected by a case, uneven surfaces, or handling. A reliable app should provide a straightforward calibration process. Calibrate on a known level surface before starting, and recalibrate if the phone is bumped, moved between environments, or fitted with a different case.
3. Target-Angle and Hold Functions
A target-angle feature lets you set a desired number, such as 45 degrees, and receive feedback when you reach it. A hold function freezes the current measurement, which is helpful when the phone must be removed from a difficult-to-see location before you can read the result.
4. Haptic and Audio Options
Look for adjustable haptic feedback rather than a single fixed vibration behavior. In a quiet room, a gentle pulse may be enough. In a busy workshop, you may want haptics combined with an audio alert. The ability to turn sounds off is also valuable when working indoors or around other people.
5. Offline Functionality
Angle measurement relies on the device's built-in motion sensors, not a mobile signal. An offline tool is useful in garages, job sites, basements, workshops, and remote locations where Wi-Fi or cellular coverage is unreliable. It also keeps essential measurement features available without requiring an account or subscription connection.
6. A Stable, Easy-to-Read Layout
Choose an interface with large numbers, a clear bubble or inclinometer display, and strong contrast. When measuring a corner, you may be holding the phone at an awkward angle, so small text and cluttered controls can slow down the process.
How to Measure a Miter Angle With an iPhone
An iPhone can help measure the angle of a wall corner, an existing trim piece, or a saw setup. For the best results, use a flat, clean phone case or remove a bulky case that prevents the device from sitting flush against the surface.
- Prepare a stable reference surface. Clear dust, nails, debris, and loose material from the area you will measure.
- Calibrate the level tool. Follow the app's calibration instructions on a surface you know is level or use a trusted physical level as a reference.
- Identify the angle type. Decide whether you are measuring a wall corner, a board edge, a miter saw table setting, or blade bevel.
- Place the iPhone flat against the first surface. Keep it steady and note the reading, or use a zero/reset function if available.
- Move to the second surface. Hold the same edge of the phone against the adjacent wall or board face.
- Read or capture the angle. Use the on-screen value and haptic confirmation to stabilize your positioning.
- Calculate the cut. For a two-piece miter joint, divide the included corner angle by two.
- Make test cuts first. Use scrap material before cutting expensive trim or hardwood.
For example, if an inside corner measures 92 degrees, each board will generally need a 46-degree miter. Make two 46-degree test cuts, bring them together, and inspect the joint against the actual wall. Small adjustments may still be needed because walls can bow, drywall can build up in corners, and boards may not sit perfectly flat.
A Practical Method for Measuring an Inside Corner
Measuring an inside corner directly with a phone can be awkward because the device cannot always lie flat across both surfaces at once. A more dependable approach is to use a straight scrap board or a simple angle-transfer method.
- Hold a straight board flat against one wall near the corner.
- Place the phone against the board and zero the angle tool if the app supports relative measurement.
- Move the board or phone reference to the second wall while keeping the setup flush.
- Record the resulting angle change.
- Divide the included angle by two to determine the starting miter setting.
This method reduces errors caused by uneven drywall texture or a phone case that cannot reach fully into the corner. It is also useful for outside corners, where rounded drywall beads can prevent a direct measurement.
Common Errors That Affect Miter Measurements
Even a good digital level tool cannot overcome poor measurement technique. Avoid these common issues before trusting a reading.
- Measuring over a phone case: Thick, curved, or uneven cases can change the contact angle.
- Using a warped reference board: Check scrap wood with a straightedge before using it to transfer angles.
- Confusing inside and outside corners: The same measured angle may require a different cut orientation depending on the joint.
- Skipping test cuts: A test piece is faster and cheaper than replacing finished material.
- Ignoring saw accuracy: A miter saw detent labeled 45 degrees may not be exactly 45 degrees. Verify it with an angle tool.
- Holding the phone inconsistently: Use the same flat edge of the device for each measurement.
Workshop safety reminder: Never balance, clamp, or place a phone near a moving saw blade. Measure with the saw powered off, remove the phone from the work area, and then make the cut using normal eye and hearing protection.
Using Haptic Feedback to Set a Miter Saw
Haptic feedback can also help when checking whether a miter saw is set to a chosen angle. With the saw unplugged or its battery removed, place the phone on a stable, flat part of the saw table or against a straight auxiliary fence. Zero the tool on the reference surface, then rotate the saw table or position the angle reference until the target measurement is reached.
Do not place the phone directly on a blade or depend on a single reading from an irregular surface. Check the setup twice, especially if you are calibrating the saw's detents. For precision work, compare your phone reading with a quality physical square, digital angle gauge, or test-cut result.
When to Use a Dedicated Angle Finder Instead
An iPhone haptic level tool is excellent for quick checks, layout, and portable DIY measurements. However, a dedicated angle finder may be the better choice for repeated production work, highly precise cabinetry, or situations involving long arms and mechanical angle transfer. A physical bevel gauge is also useful for copying an angle directly from a wall to a saw without performing calculations.
The most practical approach is often to use both. Use an iPhone app for quick sensor-based readings and convenient feedback, then confirm critical cuts with test pieces or a dedicated shop tool. This combination offers speed without sacrificing the care that visible finish work requires.
Final Takeaway
The best haptic level tool to measure a miter angle is one that provides clear degree readings, dependable calibration, target-angle feedback, and offline access when you need it. Haptics make the process more convenient by confirming position without requiring constant screen attention, but careful placement, a flat reference, and test cuts remain essential.
For DIYers who want a compact set of offline measurement tools on iPhone, Level Tool can provide a convenient way to check level, angle, and navigation measurements while working at home or in the field.
