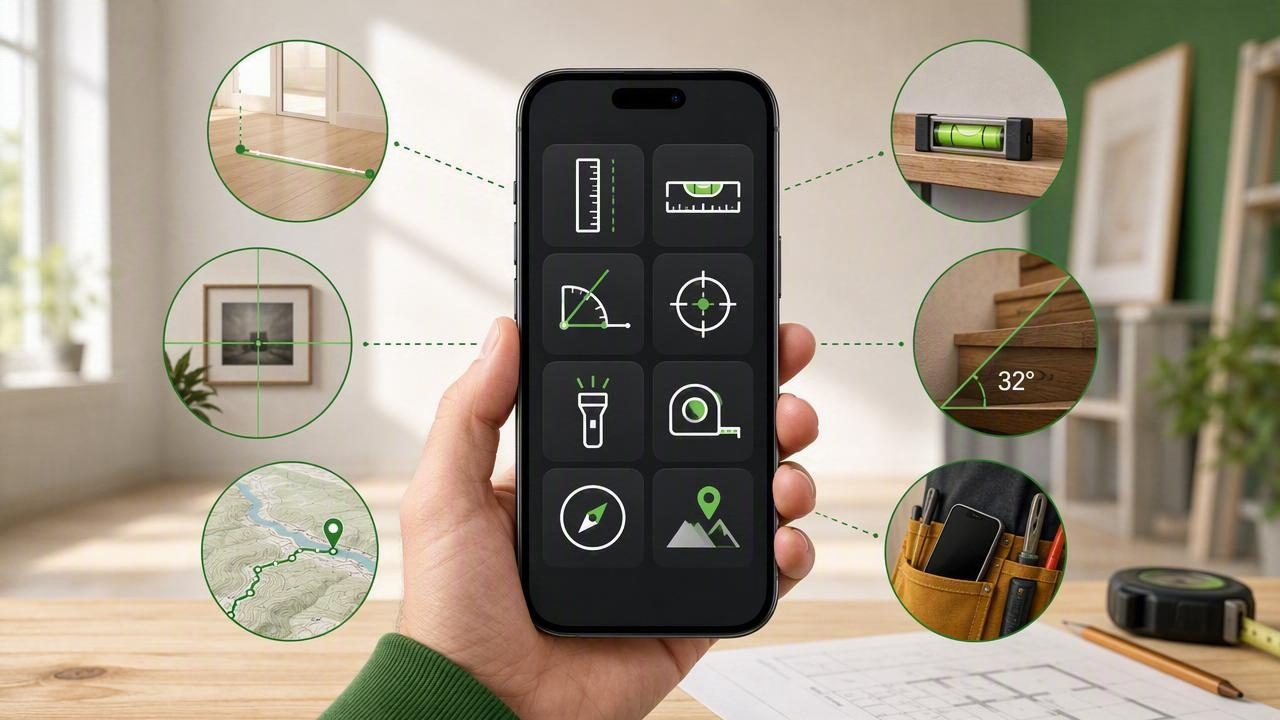
An all-in-one measurement app can turn an iPhone into a convenient collection of everyday DIY tools. Instead of switching between separate apps for leveling furniture, checking an angle, finding direction, or making a quick small-scale measurement, you can keep useful tools in one place.
That convenience matters during home improvement work. A typical project often involves more than one type of measurement: a shelf needs to be level, a bracket may need a specific angle, a wall location may need a directional reference, and a small fitting may need a quick size check. An iPhone cannot replace every professional instrument, but it can be a practical companion when you understand what each sensor-based tool can and cannot do.
This guide explains how to use an all-in-one measurement app effectively for DIY tasks, which tools are most useful, how to improve repeatability, and when to reach for a dedicated physical measuring tool instead.
What Is an All-in-One Measurement App?
An all-in-one measurement app combines several measurement and navigation functions in one iOS app. Depending on the app, these may include a bubble level, angle meter, ruler, compass, barometer, and metal detector. The tools rely on iPhone sensors and hardware, such as the accelerometer, gyroscope, magnetometer, and barometric sensor where supported.
The main advantage is not that one phone replaces an entire toolbox. The advantage is fast access to useful reference readings when you are already working on a project. For example, you can check whether a cabinet is level, verify a 45-degree cut setup, confirm the direction of a hiking route, and inspect a small screw or trim piece without installing multiple apps.
For many users, offline functionality is also important. Core tools that work without a connection are useful in garages, basements, remote campsites, unfinished properties, and outdoor work areas where Wi-Fi or mobile service may be unreliable.
The Most Useful Measurement Tools for DIY Projects
| Tool | Best DIY Uses | Important Limitation |
|---|---|---|
| Bubble level | Shelves, pictures, appliances, tables, RV setup | Requires stable contact with a flat surface |
| Angle meter | Braces, ramps, trim, miter setup, slopes | Needs calibration and a reliable reference plane |
| Ruler | Small parts, hardware, trim checks, quick comparisons | Not a substitute for a tape measure on larger jobs |
| Compass | Outdoor navigation, orientation, route planning | Can be affected by nearby metal and electronics |
| Barometer | Tracking local pressure changes outdoors | Does not forecast conditions by itself |
| Metal detector | Locating some nearby metal objects or checking an area | Detection depends on object size, distance, and interference |
Use the Bubble Level With Real Surface Contact
A digital bubble level is one of the most practical tools in an iPhone measurement app. It is useful for hanging wall decor, leveling a workbench, checking a washing machine, or setting up furniture. However, accurate use depends on actual contact between the phone and the surface being checked.
Place the iPhone flat against a clean, stable area whenever possible. If you are checking a shelf, set the phone directly on the shelf rather than holding it above the surface. For a vertical check, place a flat edge of the phone against the side of a cabinet, frame, or post. Remove thick cases if they create an uneven contact point or prevent the device from sitting squarely.
Do not rely on a reading taken from a soft, curved, dusty, or vibrating surface. A couch cushion, loose board, warped trim piece, or running appliance can produce a reading that is difficult to repeat. Let the display settle for a moment before adjusting the object.
Concrete Example: Leveling a Floating Shelf
- Place the shelf loosely on its installed brackets.
- Set the iPhone flat on the shelf surface, with the case removed if needed.
- Wait for the level reading to stabilize.
- Adjust one bracket slightly until the display reaches the target level position.
- Move the iPhone to the opposite end of the shelf and check again.
- Repeat the check from the center of the shelf.
Checking more than one location helps reveal whether the shelf itself is bowed or whether one bracket is carrying more of the adjustment. This is more reliable than trusting a single reading at one point.
Calibrate Before Measuring Angles
An angle meter or inclinometer is valuable for home improvement because many projects depend on slope rather than perfect level. You may need to set a ramp, check the pitch of a drainage surface, match an existing trim angle, or position a support brace.
Before using angle measurements, calibrate the tool on a surface you trust as a reference. A sturdy workbench, a known-level counter, or a verified carpenter's level can provide a reference point. Calibration tells the app what should be treated as zero for your working conditions.
After calibration, test repeatability. Put the phone down, note the reading, lift it, and place it back in the same position. If the measurement changes noticeably, inspect the surface, the phone case, and the contact point. A repeatable reading is generally more useful for DIY adjustment than a single reading that appears precise but cannot be reproduced.
For a clear walkthrough of reference calibration and practical angle checks, see Level Tool's guide to measuring angles on an iPhone.
Set Targets and Tolerance for Practical Work
DIY work does not always require an exact zero-degree result. A patio drainage area, for example, may need a deliberate slope. A picture arrangement may need to align visually with an existing architectural feature rather than with true level. This is where angle targets and tolerance are useful.
A target is the reading you want to reach, such as a specific angle for a brace or slope. Tolerance is the acceptable range around that target. Rather than making endless tiny adjustments, decide what range is suitable for the project before you begin.
For instance, if you are placing a board as a simple drainage guide, first establish the desired slope according to the project requirements. Then make consistent checks along the board. The goal is not to claim a certified measurement; it is to create a repeatable reference while you adjust the material.
Visual, sound, and haptic feedback can also help when your hands are occupied. These signals are especially convenient when adjusting a bracket or appliance foot because you can focus on the hardware instead of constantly watching the screen.
When a Digital Ruler Is Helpful
A ruler tool is best treated as a quick reference for small items. It can help compare screw lengths, check the width of a narrow trim piece, estimate a small gap, or confirm whether a replacement fitting is close to the original size.
For larger dimensions, use a tape measure or steel rule. Measuring wall spans, flooring, cabinetry, lumber, or room layouts requires a dedicated tool that can cover distance consistently. Avoid assuming that an iPhone ruler is appropriate for long cuts or material orders. A small measuring error can become expensive when repeated across multiple boards or tiles.
Use the ruler function for quick decisions, then verify critical dimensions with the right physical instrument before cutting, drilling, ordering, or permanently mounting anything.
Use Compass and Barometer Tools Thoughtfully
A compass is useful beyond hiking. During outdoor DIY, it can help orient a property, identify the direction of a planned pathway, or understand where sunlight may reach a garden area. To improve compass readings, move away from vehicles, metal railings, power tools, speakers, and large steel structures. These can interfere with the phone's magnetic sensors.
A barometer can provide local air-pressure information when supported by the device. This may be useful for outdoor awareness, but pressure readings should not be treated as a complete weather forecast. Conditions can change quickly, and a barometer does not replace official local weather alerts.
For navigation, use the compass as a directional aid and confirm important routes with a map, established trail information, and appropriate safety planning.
Know When an iPhone App Is Not the Right Tool
An all-in-one measurement app is convenient, but some tasks require dedicated equipment or professional inspection. Use a physical tape measure for long dimensions, a quality spirit level for critical construction alignment, and specialized instruments where job specifications demand them.
- Do not use an app as the sole basis for structural, electrical, gas, or plumbing decisions.
- Do not assume a metal detector can identify every hidden object behind a wall.
- Do not use a phone level to automatically lift, level, or stabilize a vehicle.
- Do not treat sensor readings as certified measurements for regulated or safety-critical work.
- Do not measure through photos or expect a phone screen to replace a laser distance tool.
The most dependable approach is to match the tool to the consequence of an error. The more permanent, expensive, or safety-sensitive the project, the more important it is to verify readings with suitable professional equipment.
Make Your Measurements More Repeatable
Good measurement habits matter as much as the app itself. Start with a clean, stable surface. Keep the phone still, use the same contact edge each time, and recheck after every meaningful adjustment. If a result seems surprising, measure again from another position or compare it with a known reference.
Practical rule: A measurement you can repeat is more useful than a measurement that merely looks highly precise on screen.
By combining careful contact, reference calibration, sensible tolerances, and the right backup tools, an all-in-one measurement app can make everyday DIY work faster and more organized. It is especially useful when you need offline access to a bubble level, angle meter, navigation aid, or quick measurement reference without carrying several separate devices.
